Amp Match module utilizes a collection of underlying technologies to analyze and compare your currently selected BIAS amp model to the sound of a target tube amplifier and cabinet captured live by a microphone. It then executes the tonal compensation and enhancements needed to make your amp model’s sound accurately match that of the target tube amplifier. Alternatively, Amp Match can use any pre-recorded guitar track as your target tone.
Before using the Amp Match feature in the BIAS Amp standalone version, please review the list of items below that are needed:
- Audio interface (with at least two inputs and outputs)
- Target amp (the amp that you would like to capture)
- Microphone
- Monitors (speakers) + 1/4" TRS cables or XLR cables
- Cables (standard 1/4" TS instrument cables)
- Guitar
To use Amp Match in BIAS Amp standalone mode, please refer to the steps below:
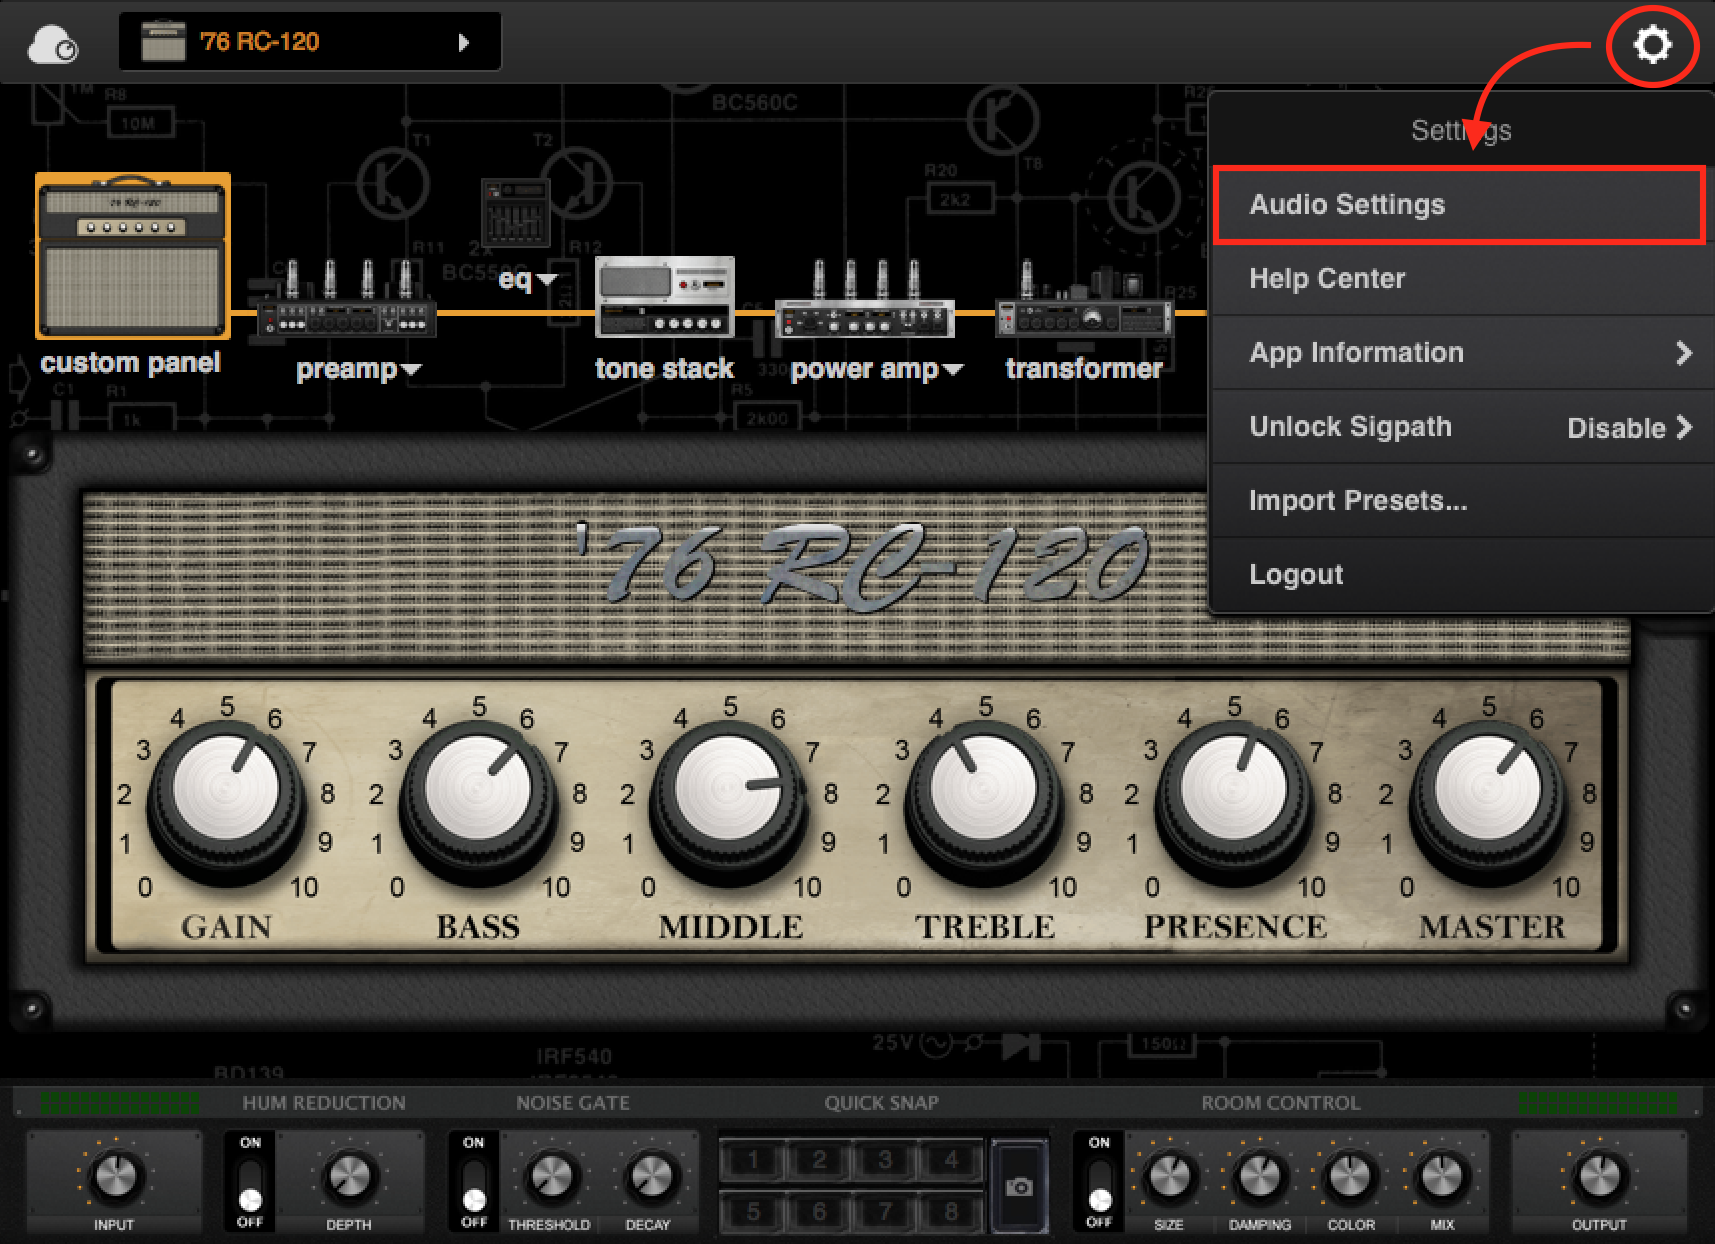
1) Launch BIAS Amp standalone app, and go to Settings -> Audio Setting.
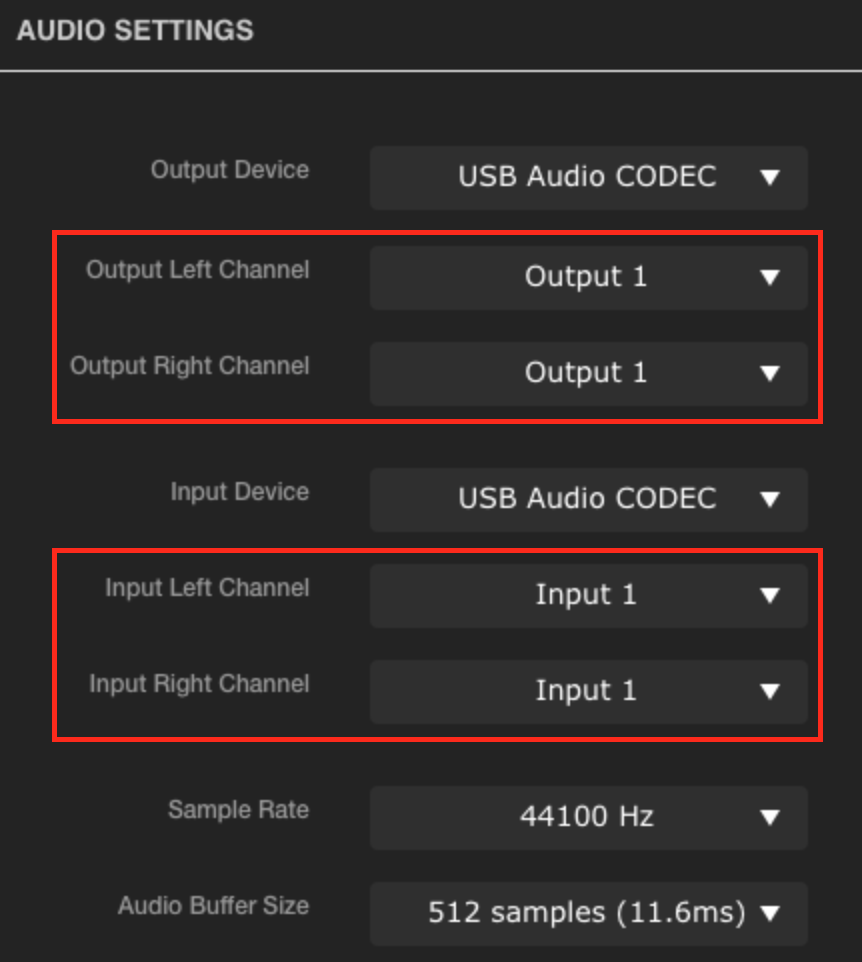
2) Select your audio interface as your Input and Output device, and set both Left Input Channel and Right Input Channel to input 1, and both Left Output Channel and Right Output Channel to Output 1
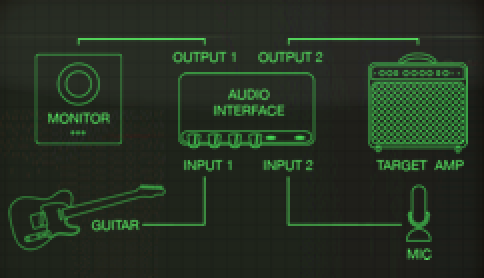
3) Plug in your guitar to input 1 of your audio interface and your microphone to input 2.
4) Connect the output 1 of your audio interface to your monitoring system (speakers), and output 2 to the Target amp's input jack.
5) After the settings above are completed, you have to select the Source Amp - a similar-sounding amp from BIAS’ presets. This will place your source guitar’s tone in the ballpark of where you want Amp Match to take it. We recommend selecting an amp from the same genre. For example, if you would like to match a tone in Metal style, we recommend selecting a preset from the Metal genre as your Source Amp.
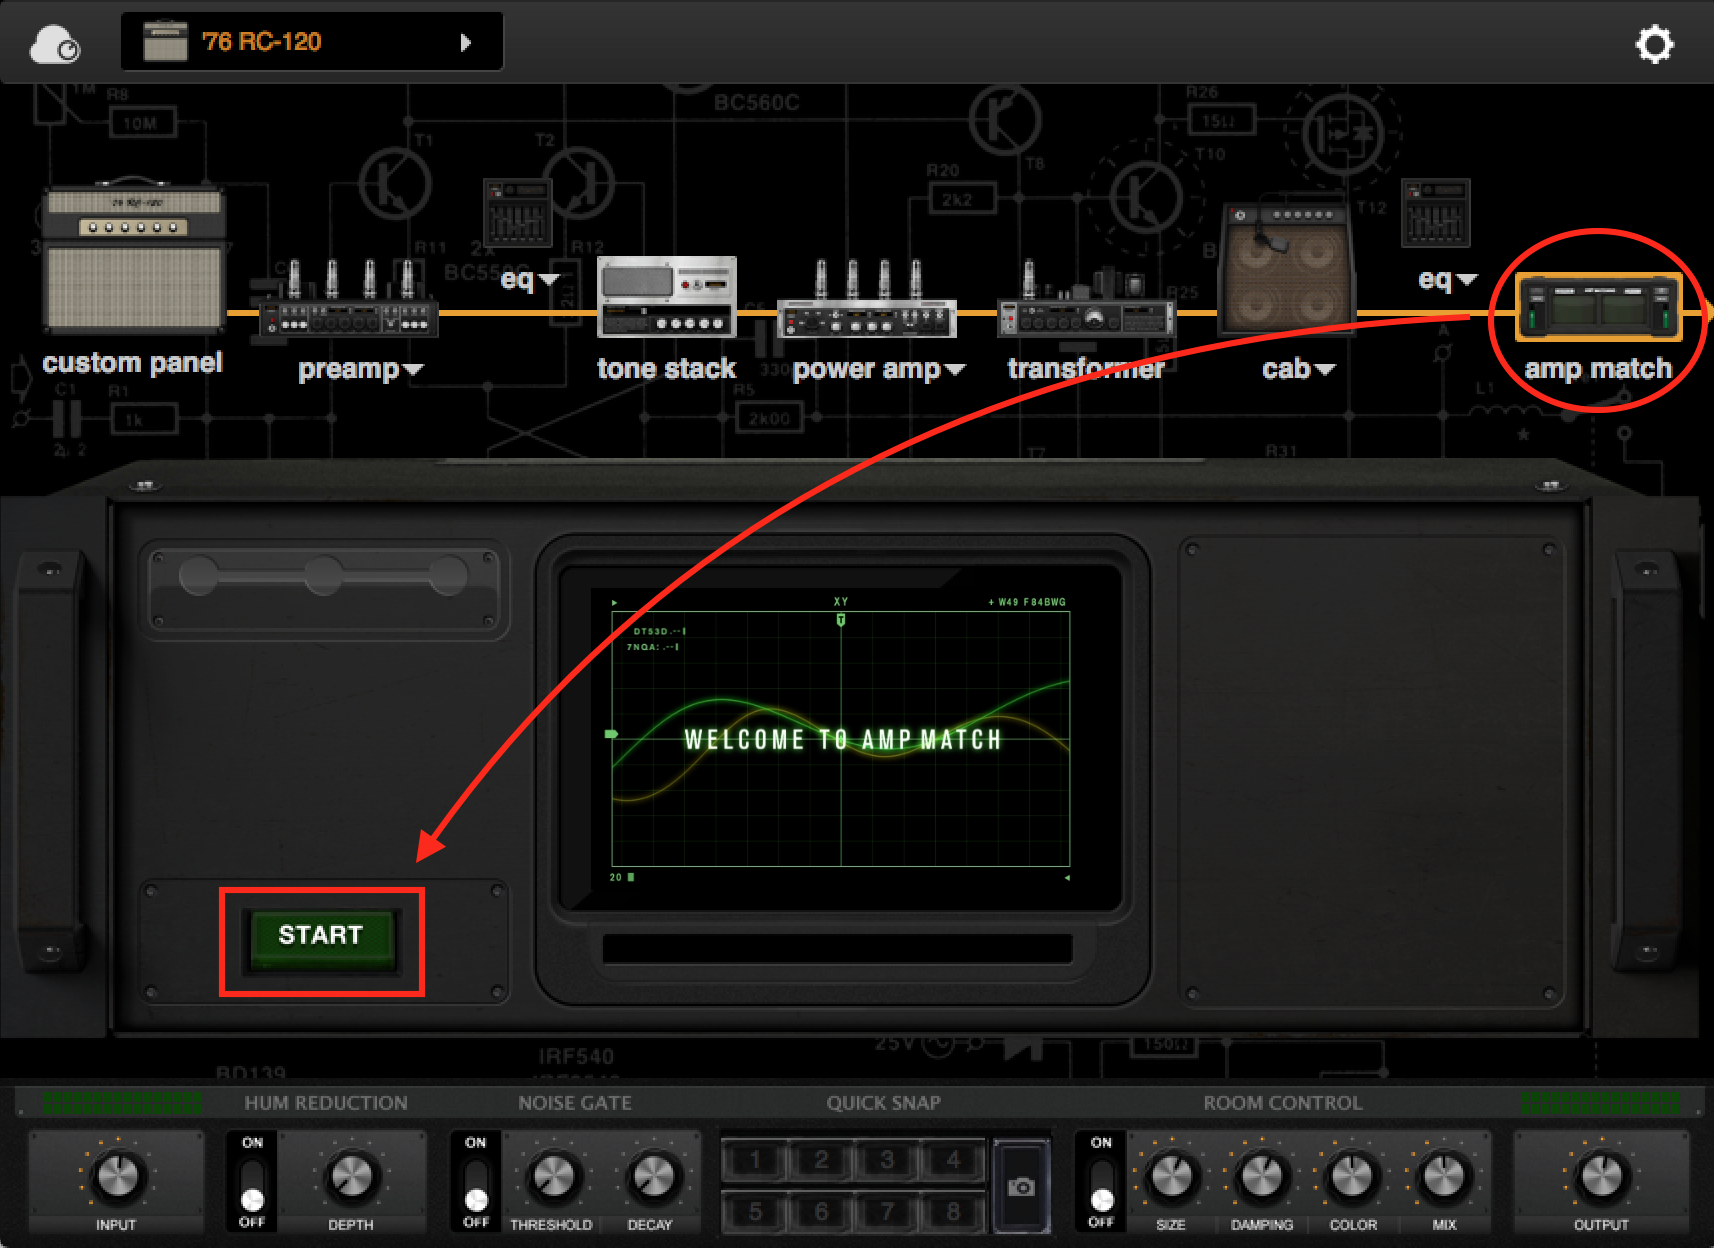
6) Once you've decided on your Source Amp, please go to the Amp Match module, and click the START button.
7) Since the settings have been completed in the earlier steps, we can go to the Sample Mode directly.
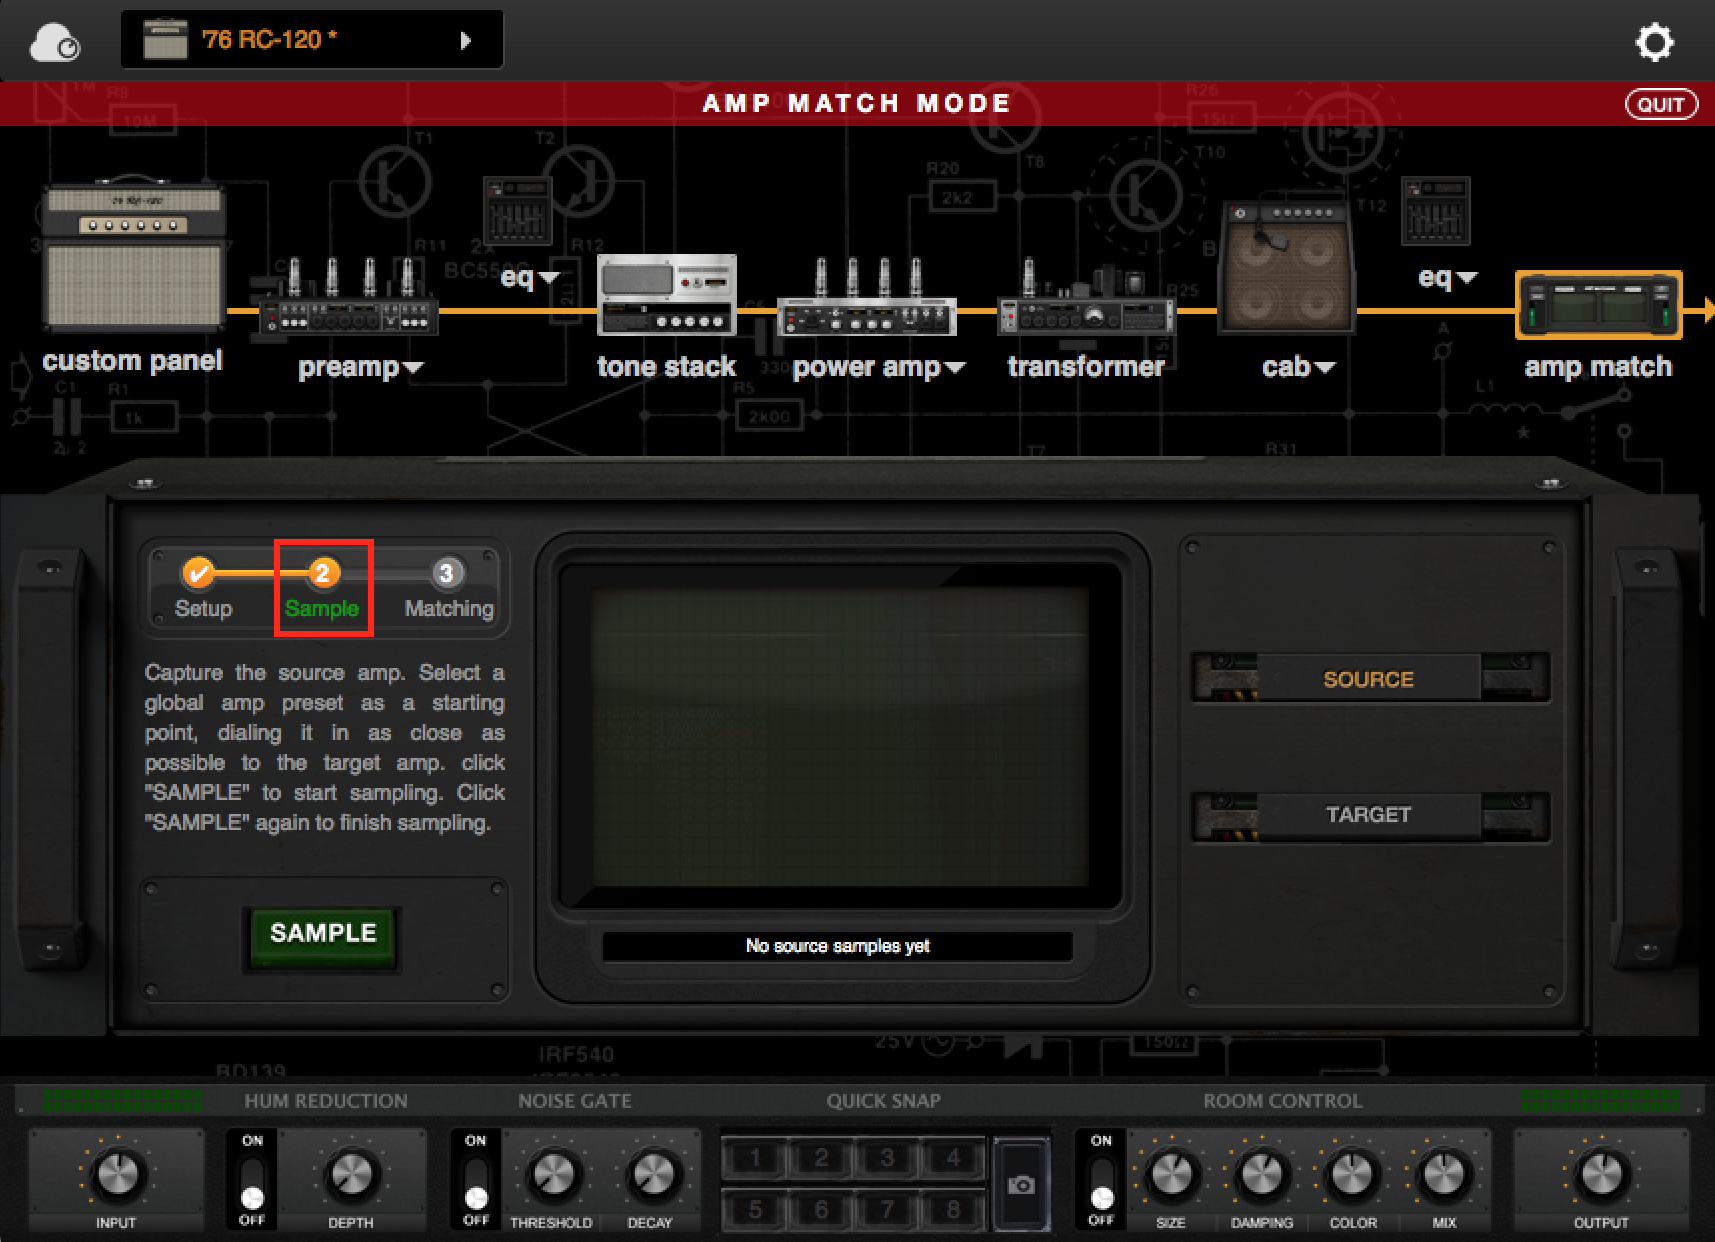
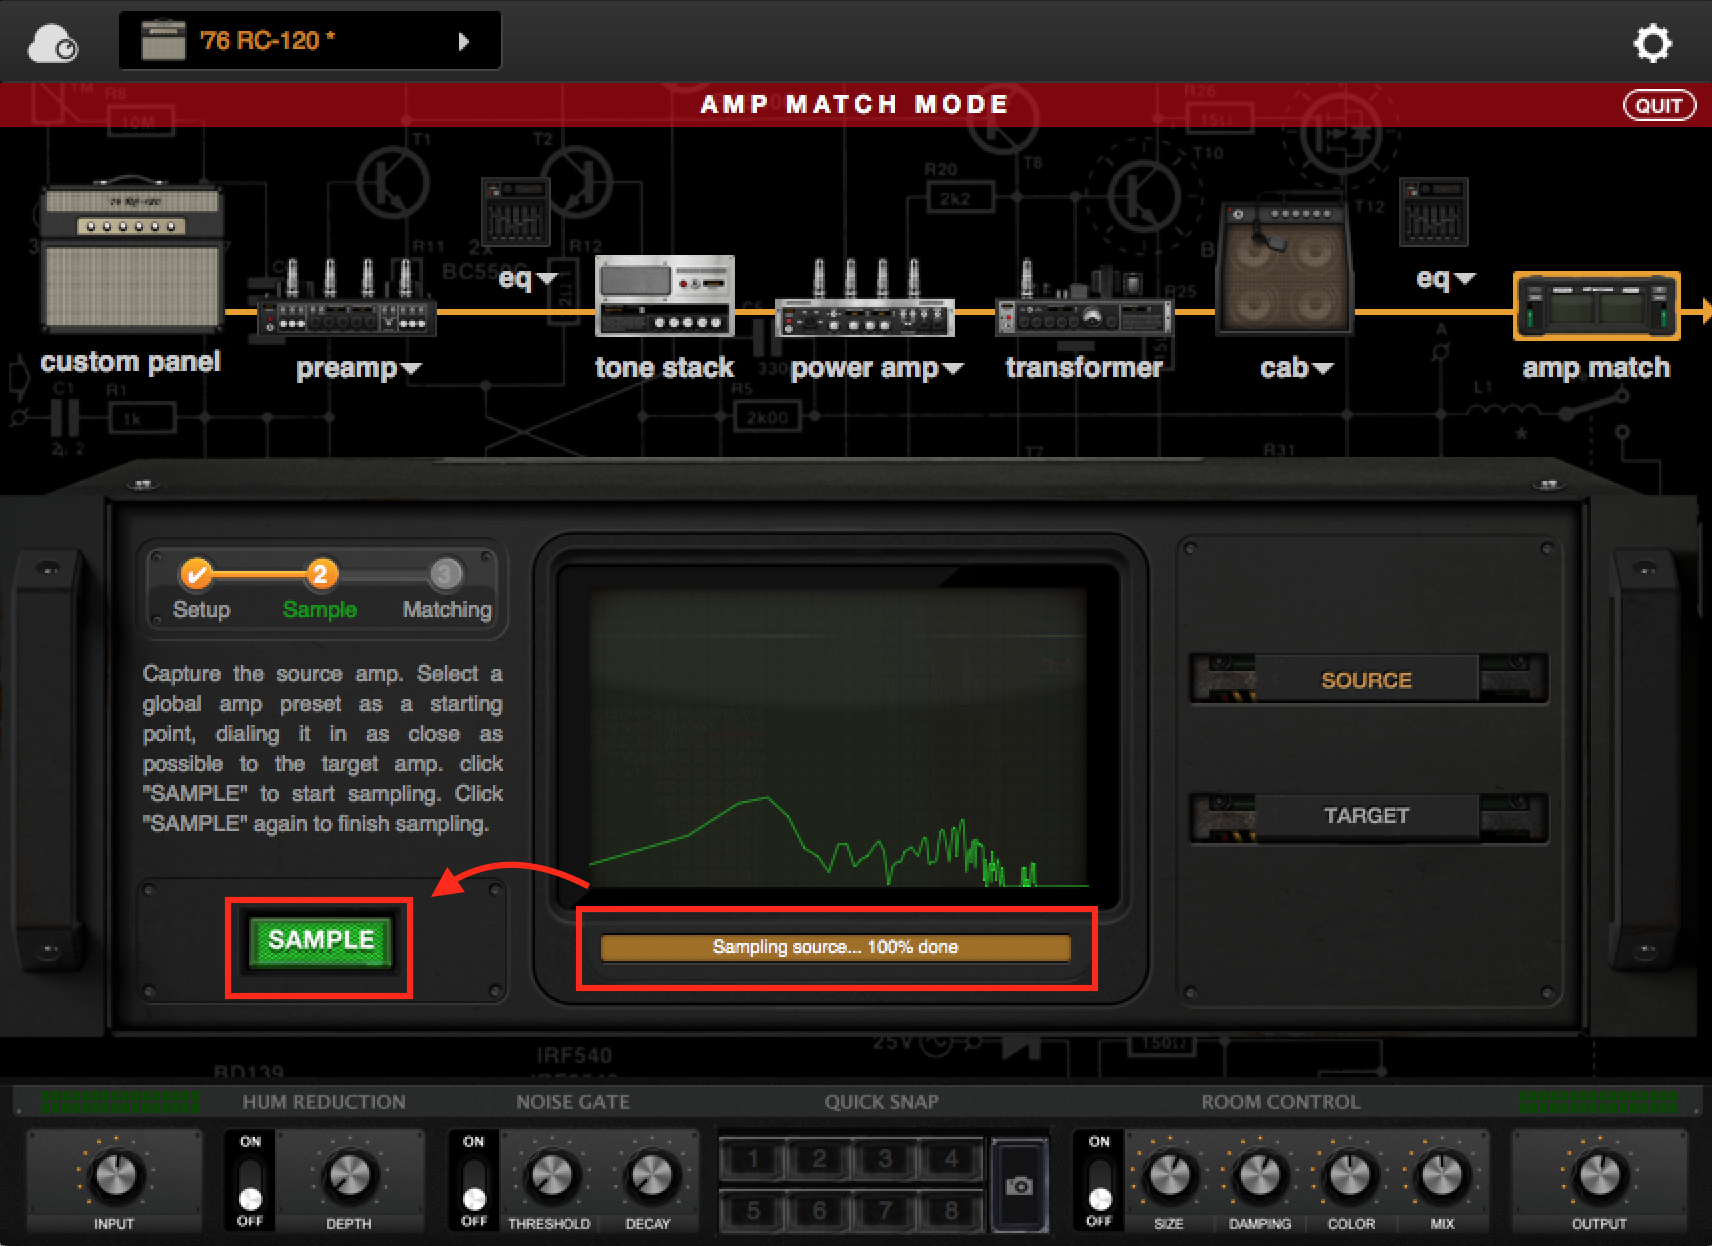
8) Let's start from Source Mode. First, click the Source button at the right side, then click on the SAMPLE button on the left side to start the capture process. Please strum your guitar during the capture process to allow the Amp Match module record your source tone.

9) After the source capture process is finished, click SAMPLE button again to stop.
10) Click Target button to switch to Target, then click on the SAMPLE button on the left side to start the capture process. Please strum your guitar during the capture process to allow the Amp Match module record your target tone.
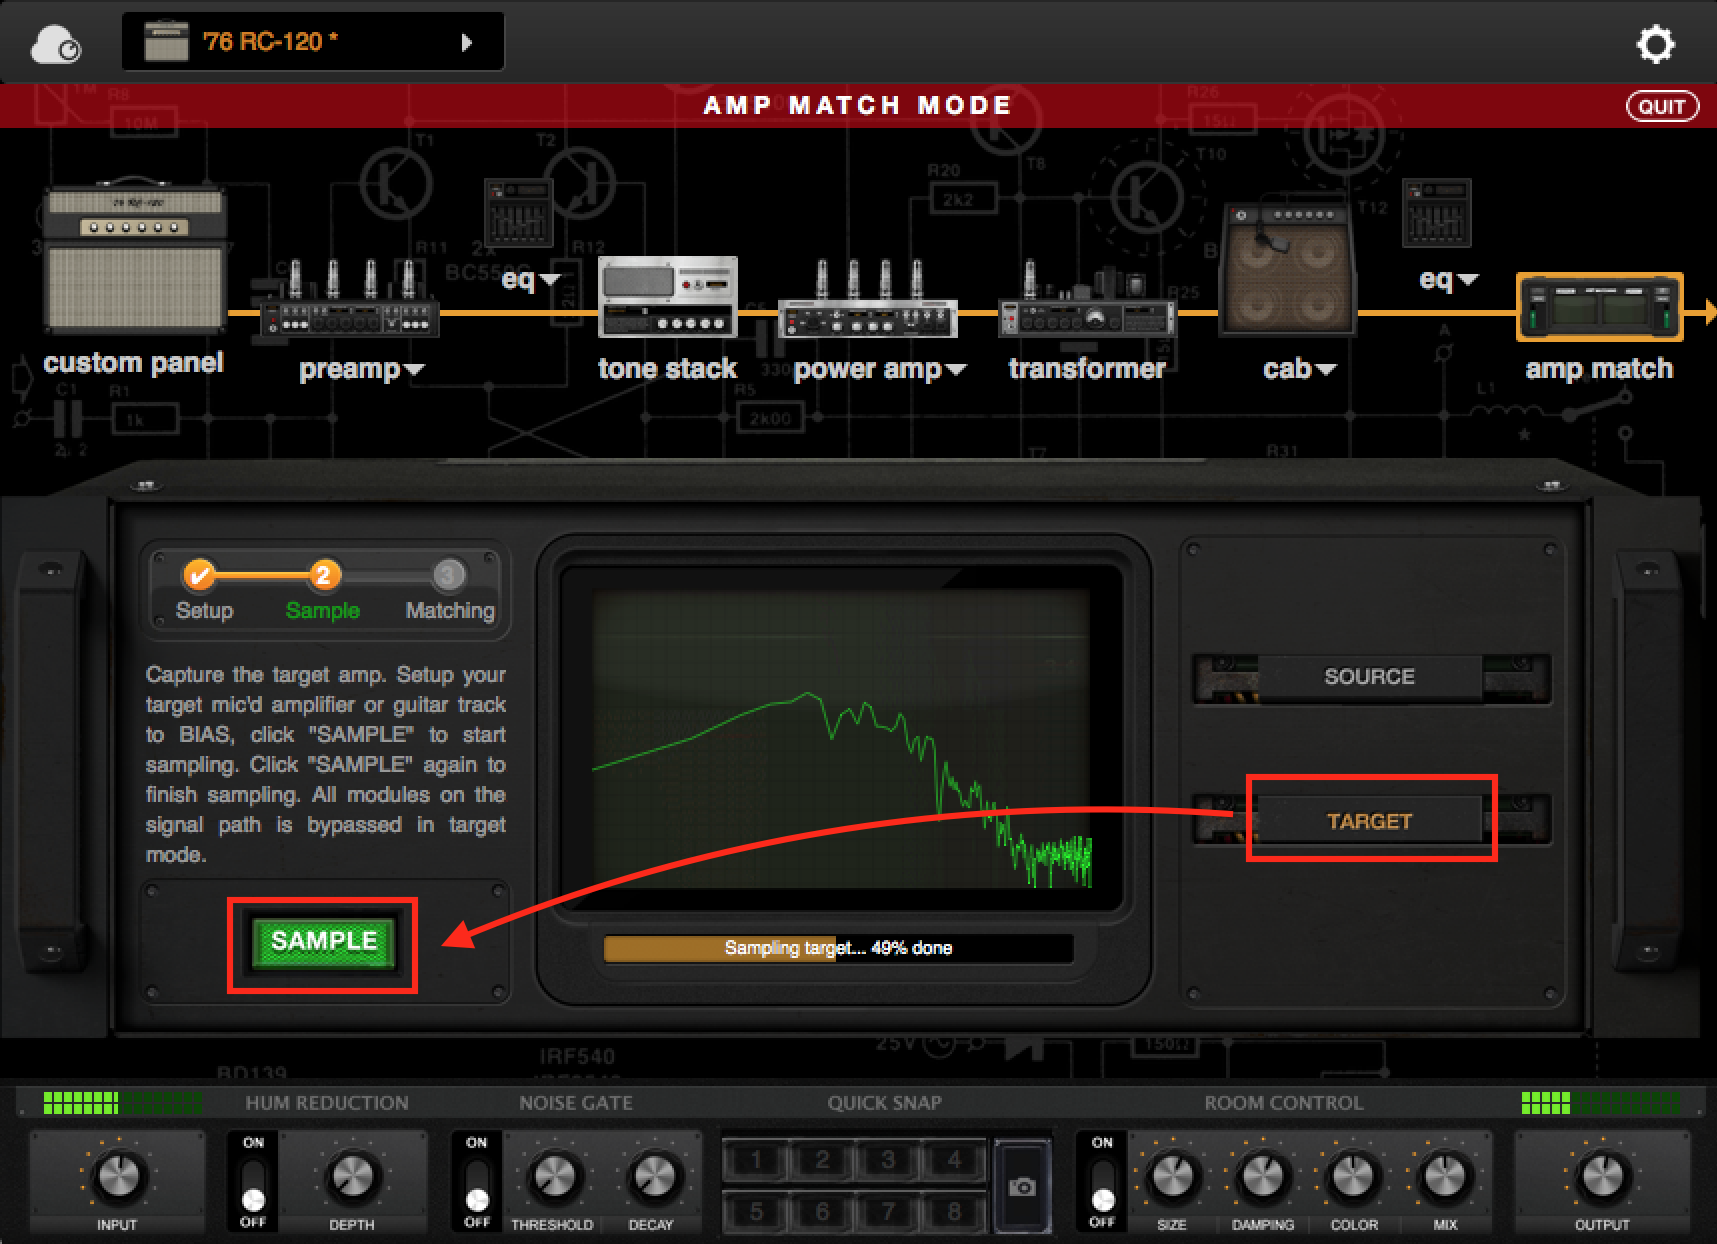
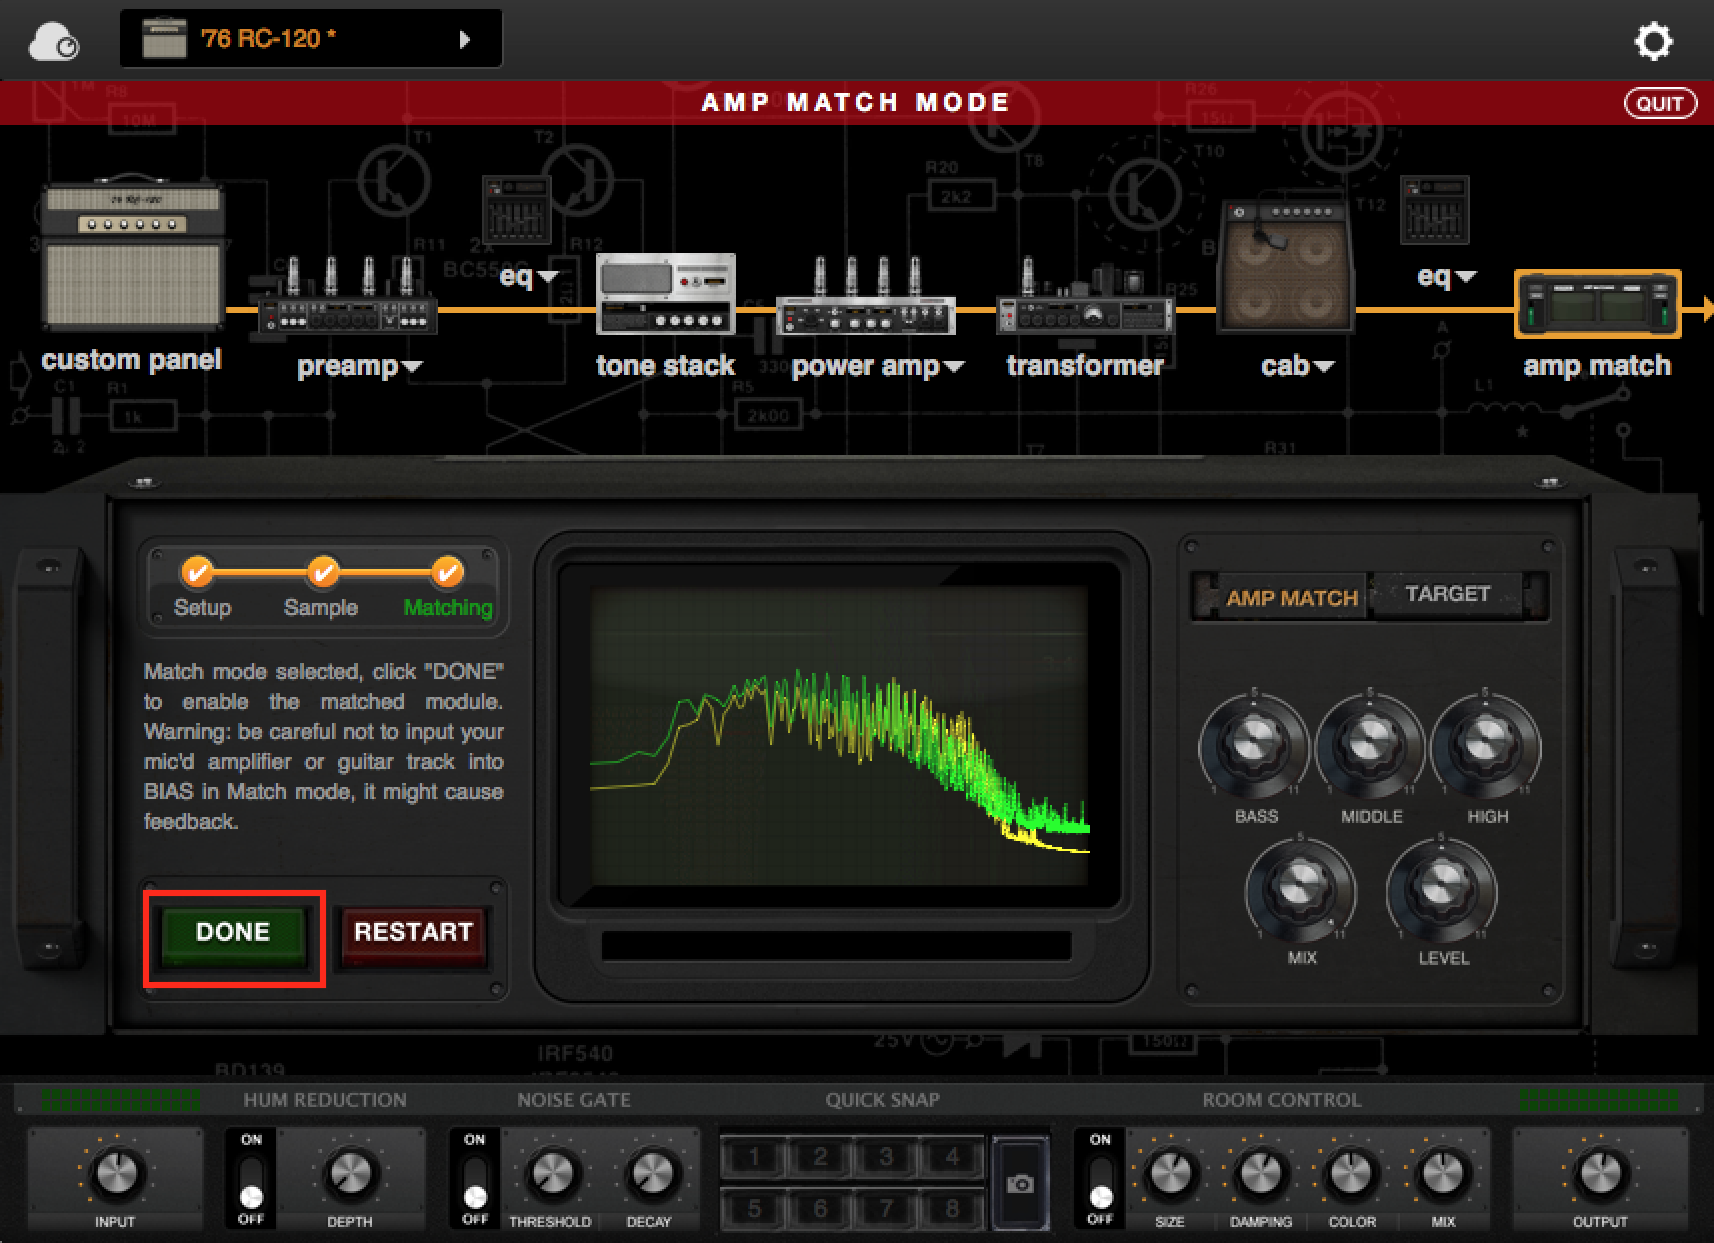
11) After the target capture process is finished, click the SAMPLE button again to stop. Then click the Matching button to enter Match Mode.
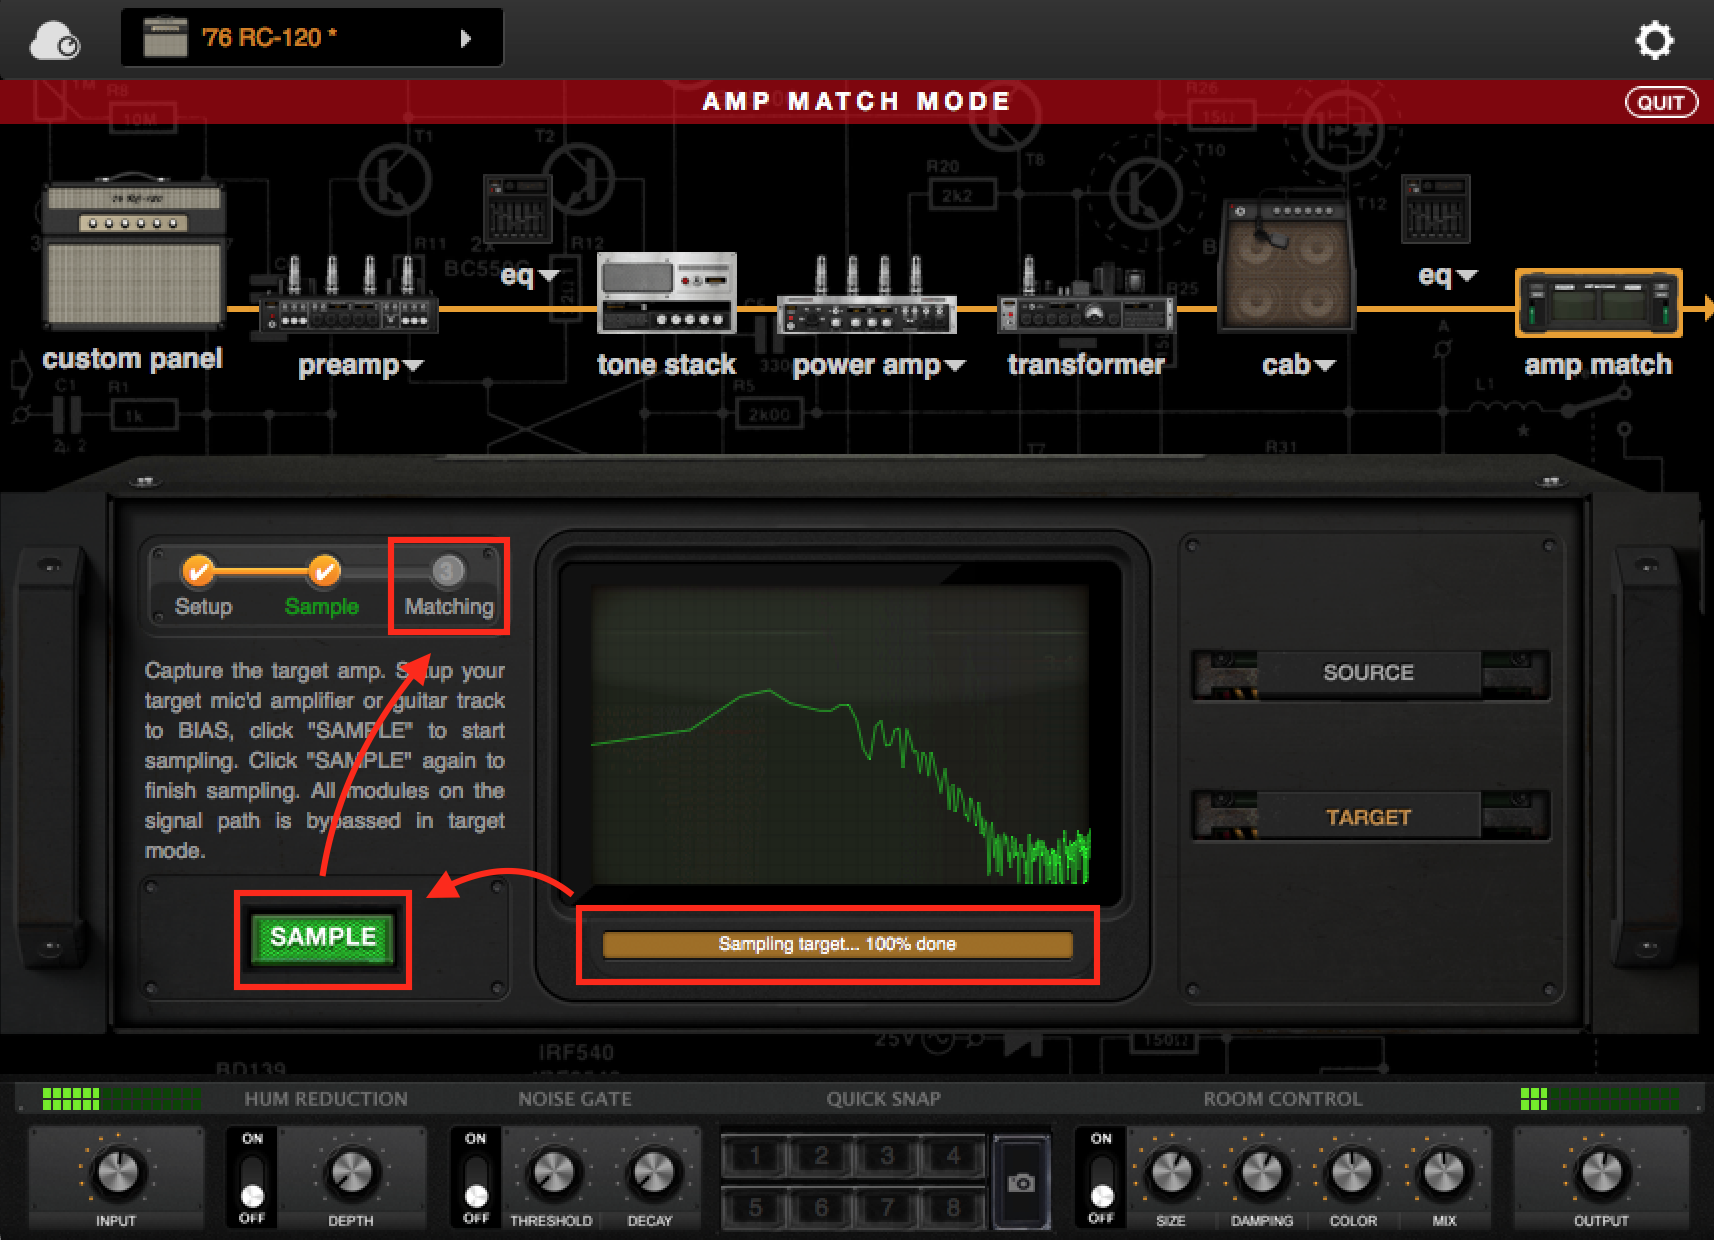
12) In Match Mode, you can fine-tune the matched tone and level by adjusting the five knobs on the right side of the Amp Match module. You can also repeat steps 6 through 10 if you feel you didn’t get perfect results the first time. Once you are satisfied with the tone, you can click "DONE" to exit Amp Match and save the preset.