Importing Presets
Please see the steps below on how to upload presets from the BIAS Amp software to your BIAS Head/BIAS Rack.
Desktop
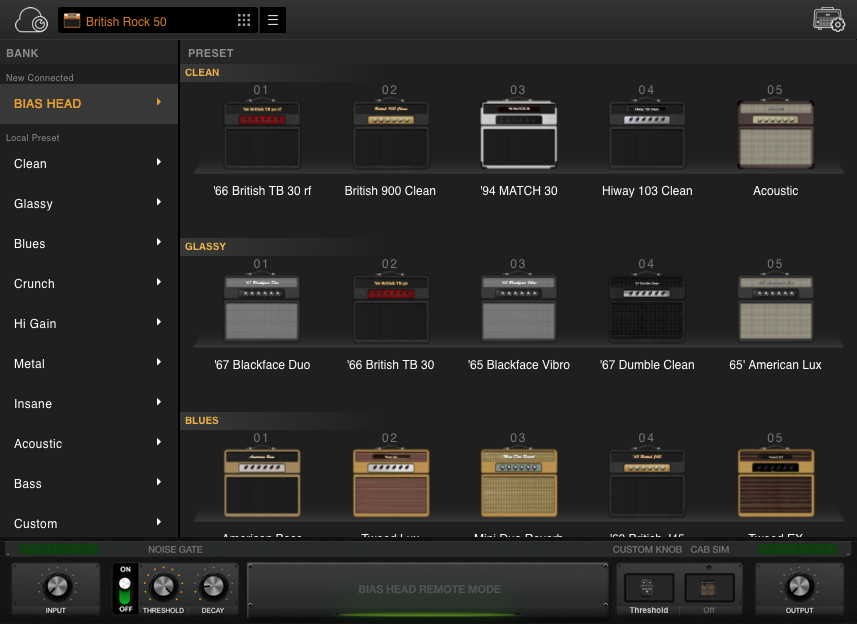
1) Start by connecting your BIAS Head/BIAS Rack to to your desktop computer via the USB Type B to USB Type A cable supplied with the unit. Then access the preset menu to access all your presets.
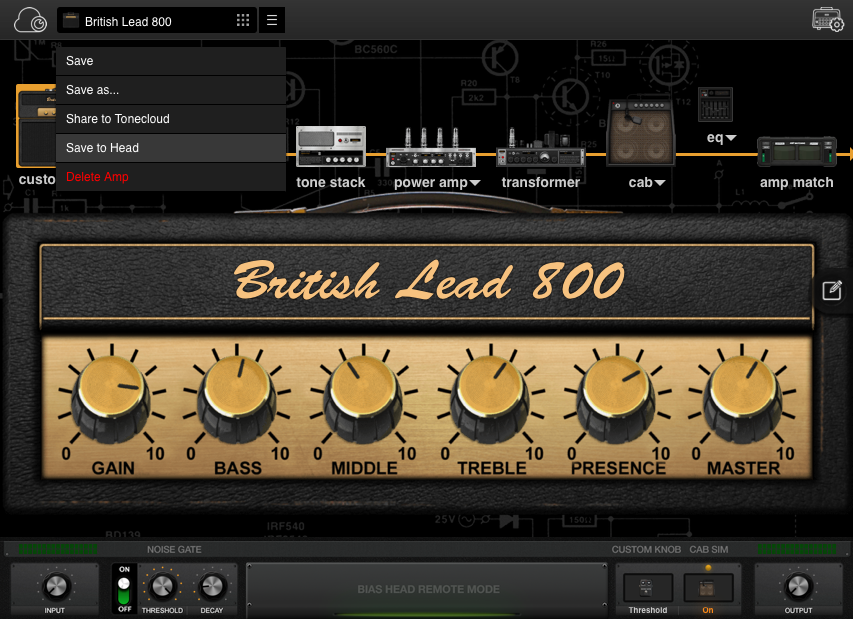
2) Select a preset that you would like to use in the BIAS Head/BIAS Rack and make any final adjustments to it if needed. Once you're done modifying, click the Save icon next to the preset menu and select Save to Head.
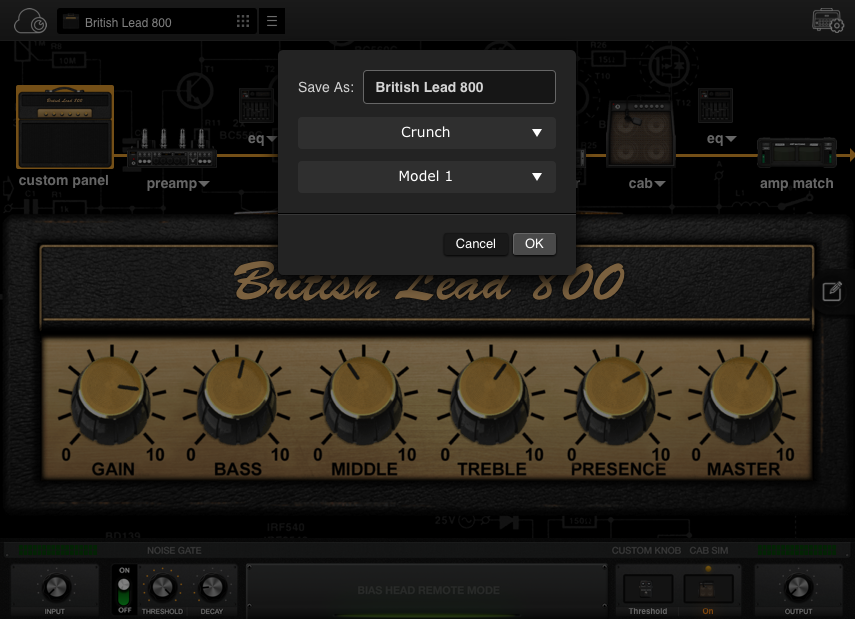
4) Enter the name, bank and model number you would like to use on the BIAS Head/BIAS Rack and select OK. The preset will now be loaded into your BIAS Head/BIAS Rack.
Mobile
1) First connect your iPad to the BIAS Head/BIAS Rack via Bluetooth, then access the preset menu within BIAS Amp.
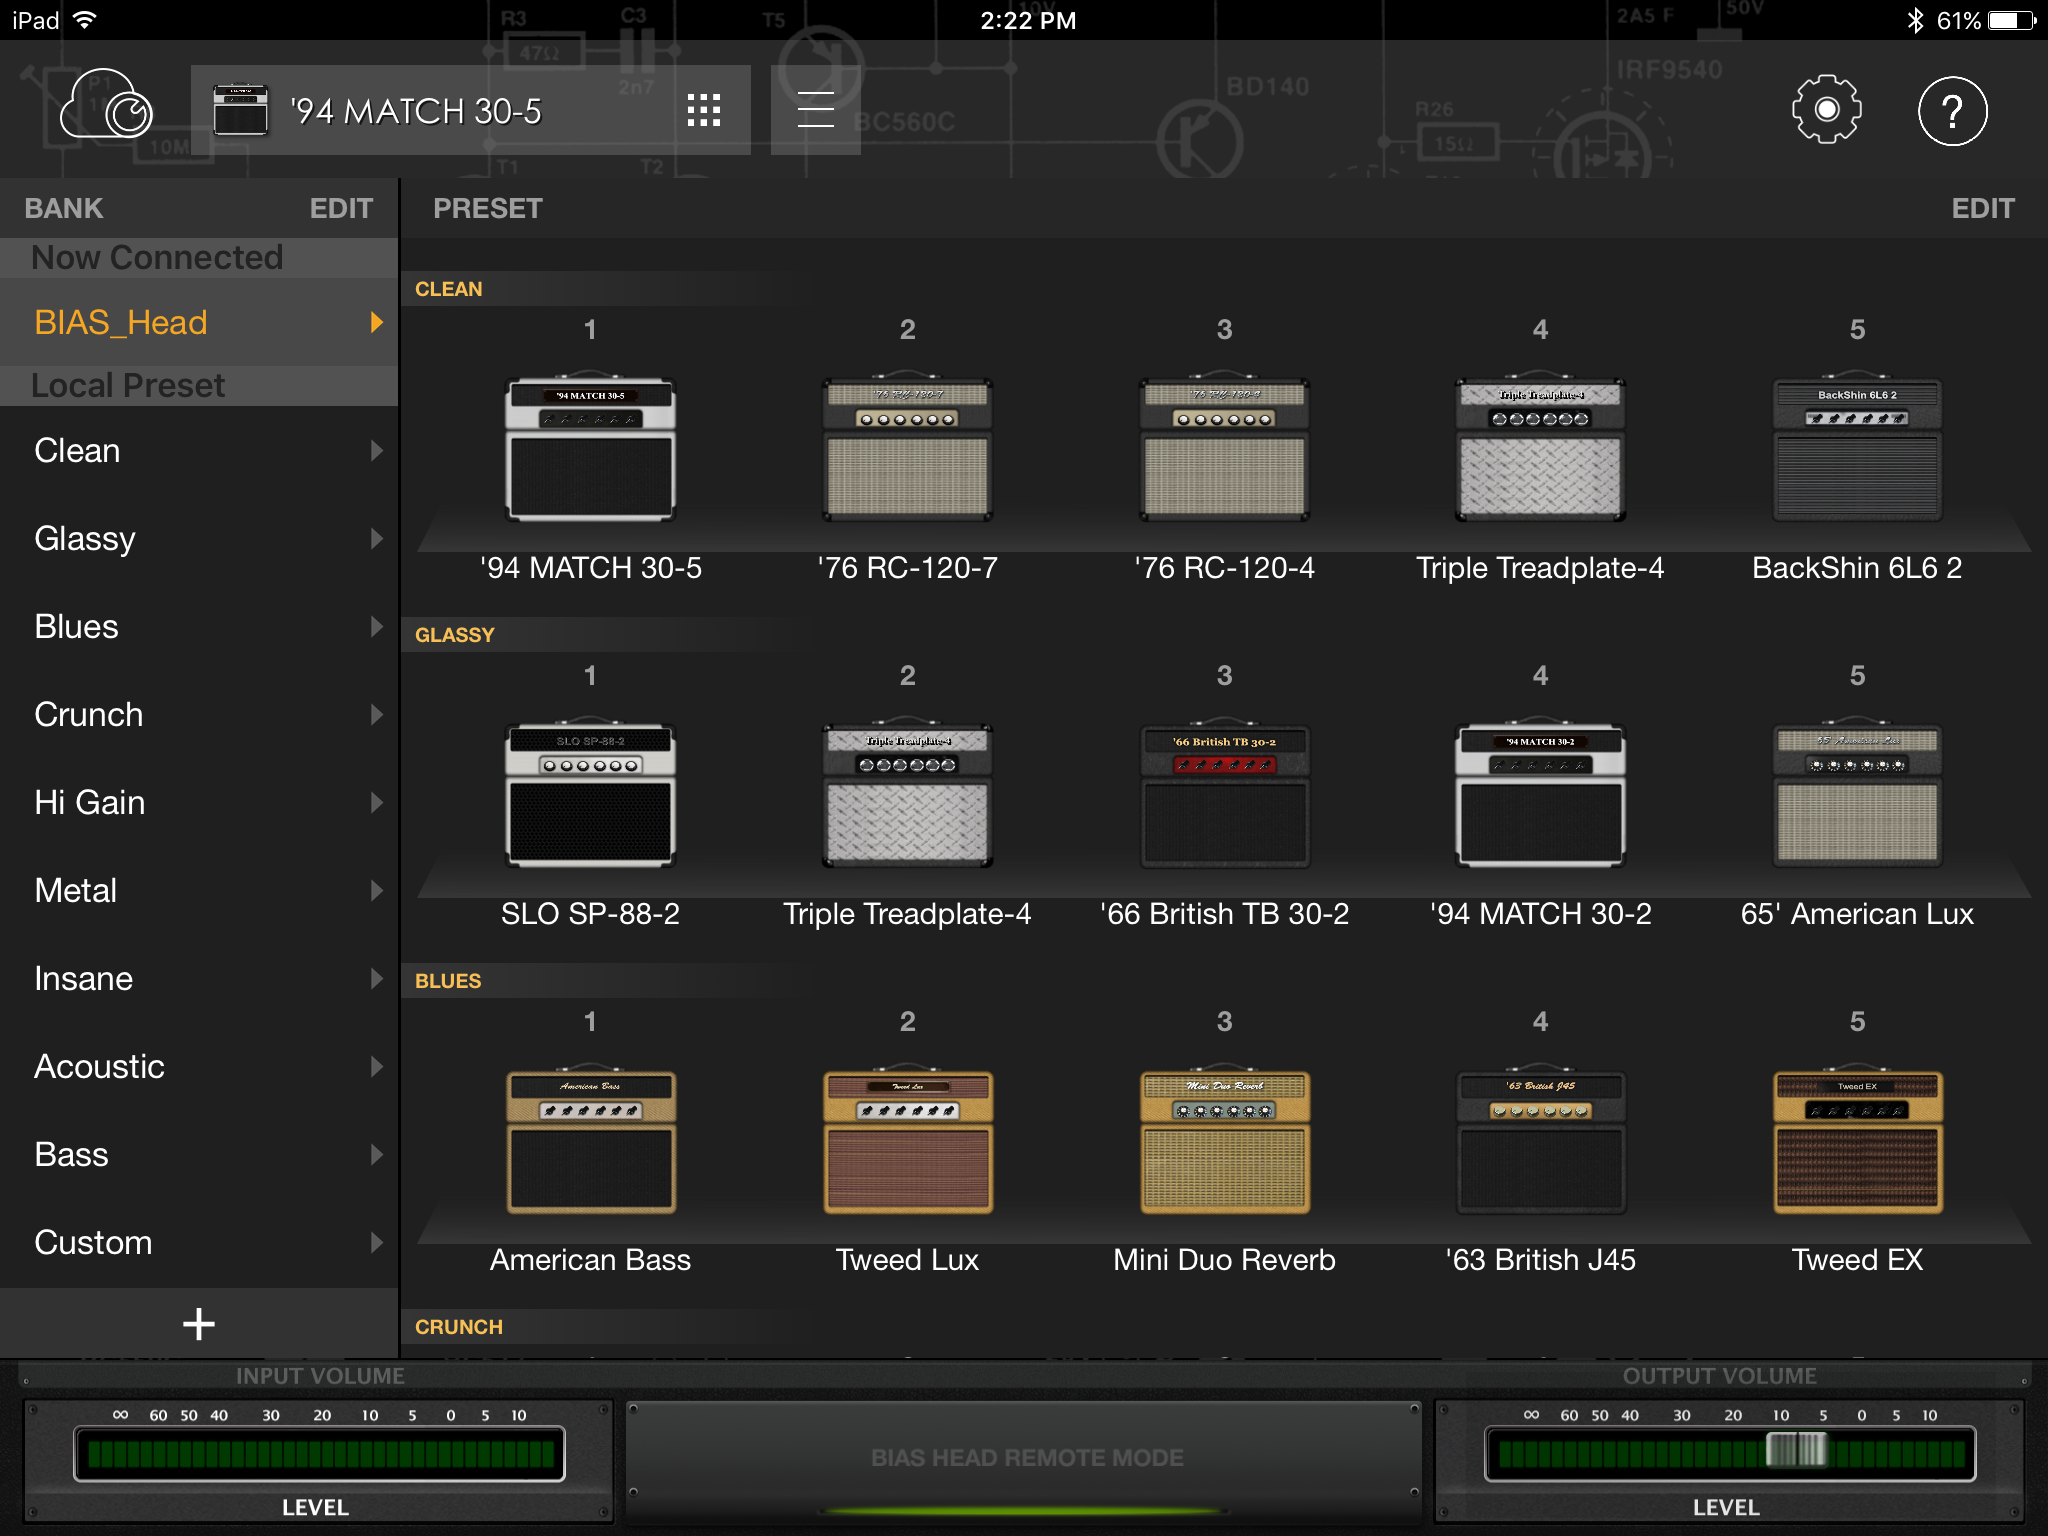
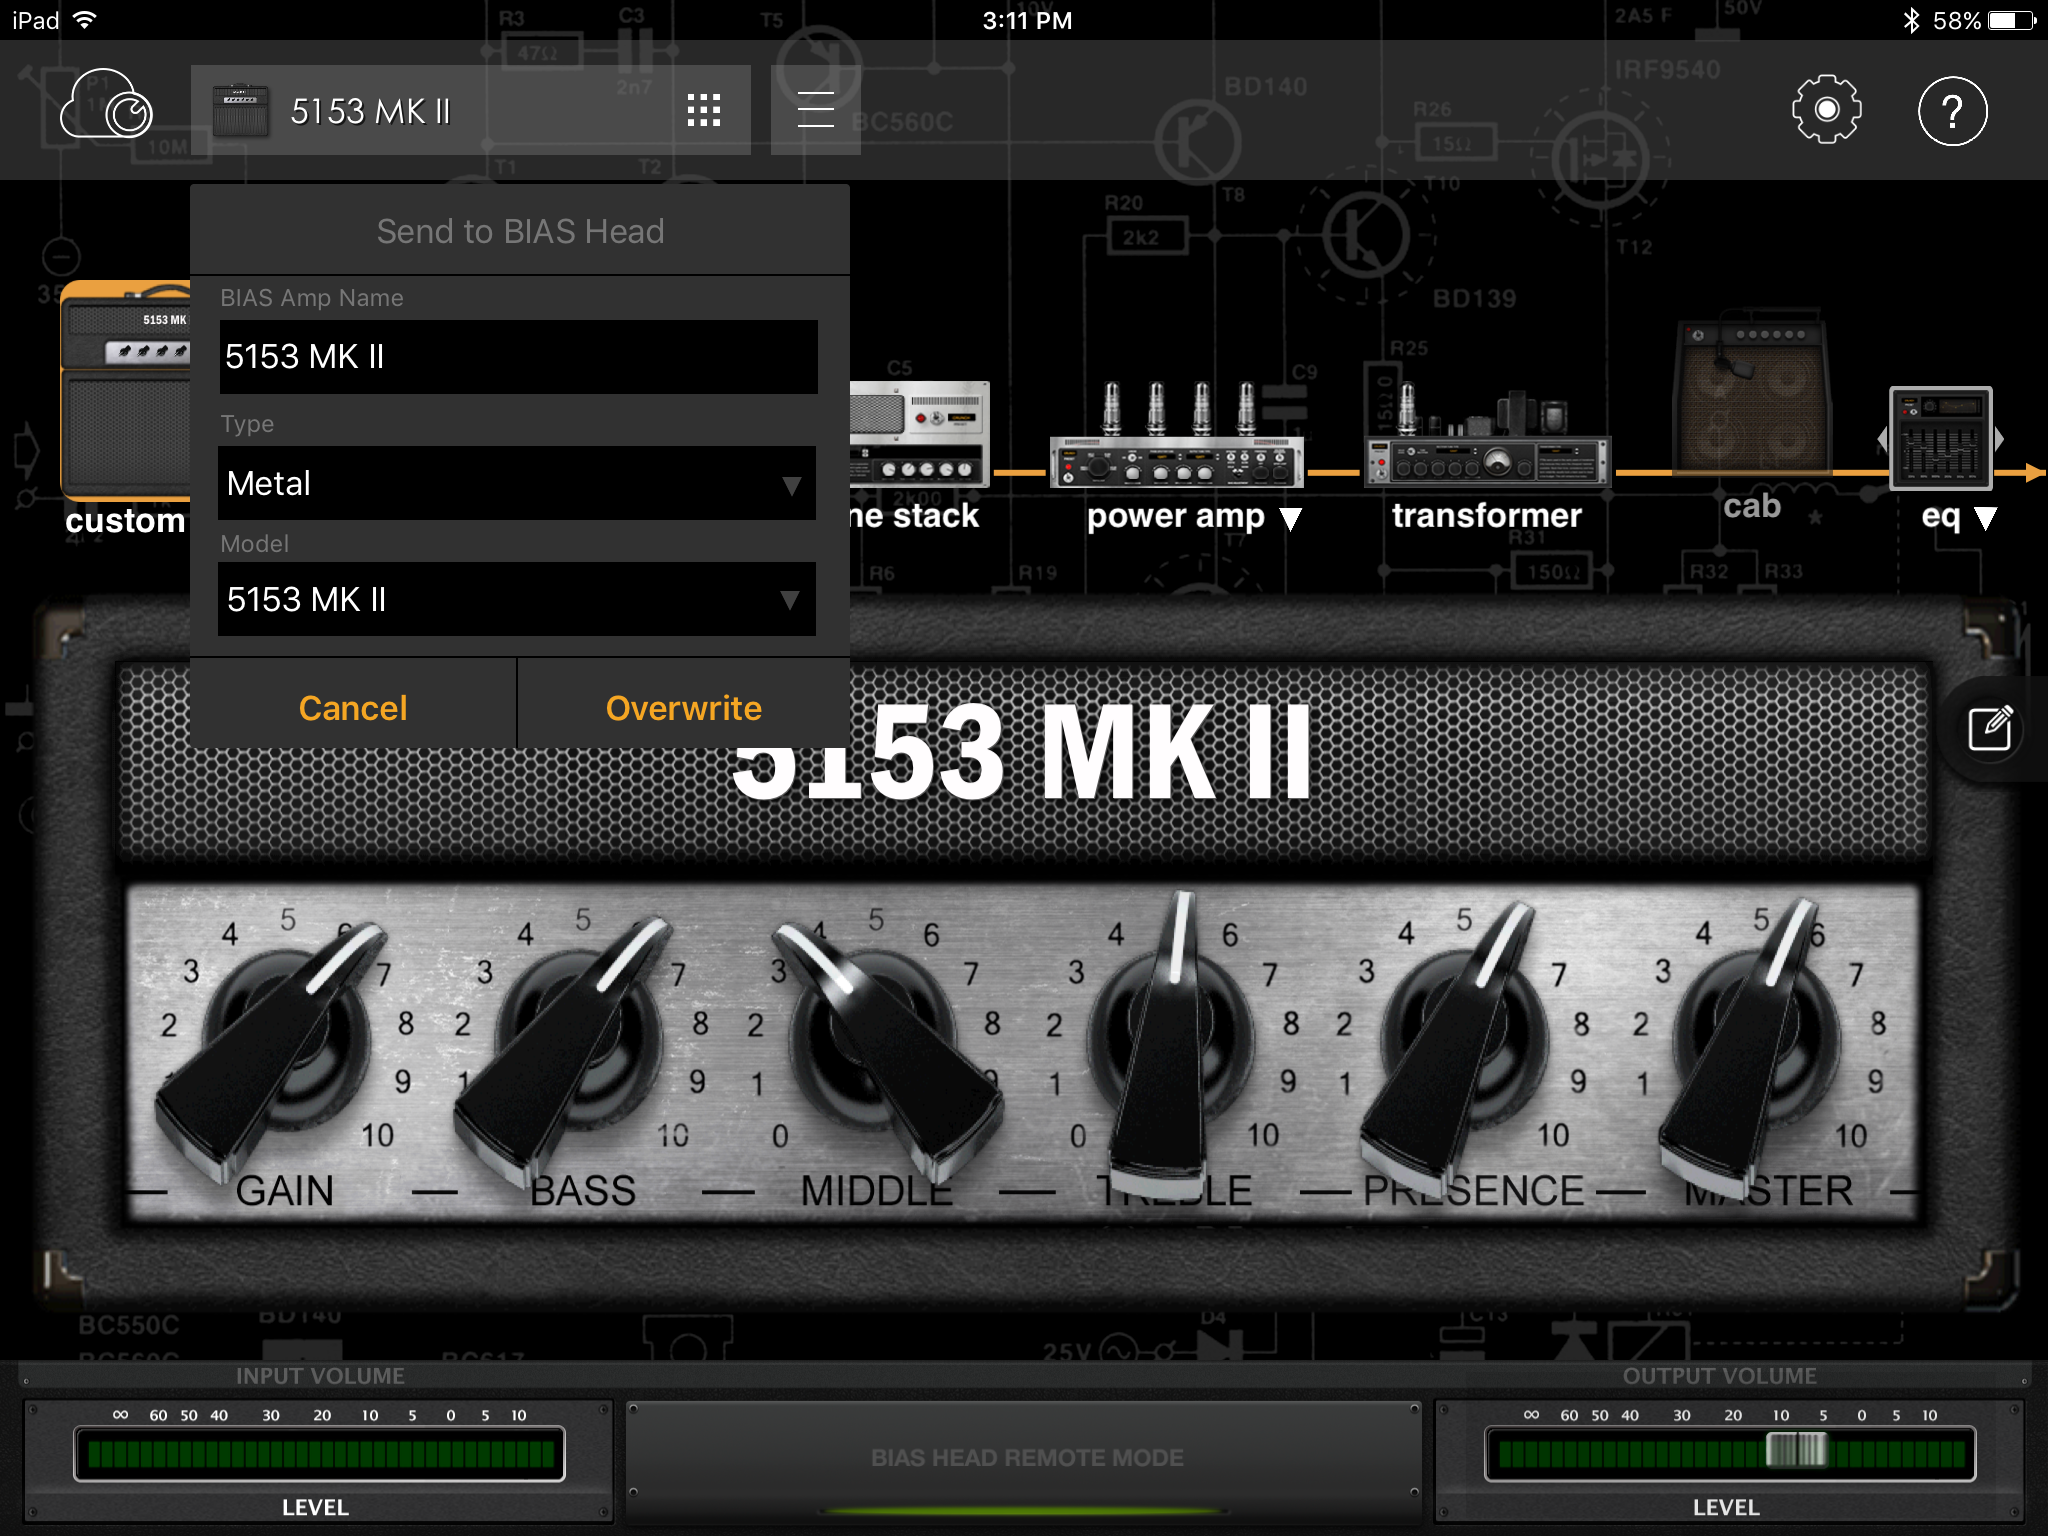
2) Select the amp that you want to import to the BIAS Head/BIAS Rack, and make any final adjustments if needed. Once you select the preset, the signal will change to this amp through the BIAS Head/BIAS Rack automatically - similar to when you preview an amp on ToneCloud. Once you're done modifying the preset, tap on the Save icon next to the preset menu and tap Send to BIAS Gear to save the preset to the unit.

3) Select the bank and the placement within that bank that your preset will reside. Name the preset if you would like to rename it. Once everything is set, tap Overwrite. That’s it!