On macOS:
1. Log into the download page, download & install the AU/VST version of BIAS FX 2.
2. Launch Live, go to ‘Live -> Preferences -> Plug-Ins.
3. Make sure the ‘Use Audio Unints’ and ‘Use VST Plug-in System Folders’ are turned on.
4. If the steps above are not working, please try the ‘Rescan Plug-ins’.
5. Select the audio track you'd like to insert BIAS FX 2 then choose Plug-Ins -> VST3 -> PositiveGrid -> BIAS FX 2 (double-click):
6. The setting box on the bottom will show up when BIAS FX 2 is inserted into the audio track successfully.
7. Choose the input corresponding to the audio interface and select "in" for the Monitor.
On Windows:
1. Log into the download page, download & install the 64-bit version of BIAS FX 2.
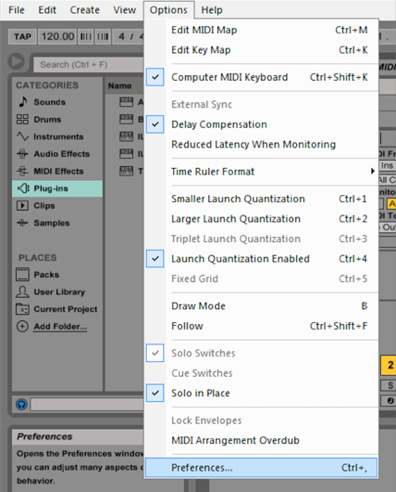
2. Launch Live, go to ‘Options -> Preferences -> File folder’:
3. Make sure the ‘Use VST Plug-in System Folders’ are turned on.

4. Please make sure the correct location is chosen on the VST Plug-in Custom Folder option. The location of plug-in files depends on your setting during installation. The default locations are as follows:
'C:\Program Files\VstPlugins'
5. If the steps above are not working, please try the ‘Rescan Plug-ins’.
Further reading:
BIAS FX 2 Plug-in Display Issues on Windows: Cut Off or Too Large