How to use this guideIn this guide, we're going to showcase how to assign parameters in BIAS FX 2 Standalone to assigned MIDI input. |
*Please note: MIDI control support is only available in the Pro or Elite version of BIAS FX 2.
Please refer to the steps below to set the MIDI parameters.
- Connect your MIDI controller to the desktop device, or launch the virtual MIDI controller app.
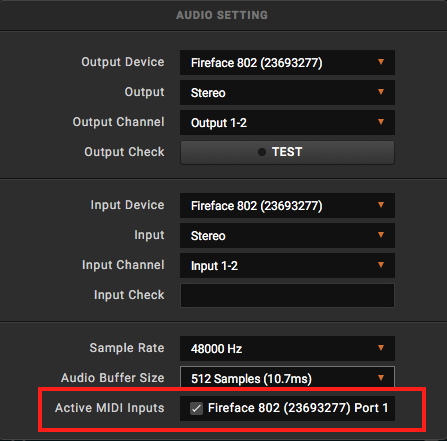
- Launch BIAS FX 2 standalone app, click on the setting icon, then choose "Audio Settings".
- Your MIDI controller or app should appear in the "Active MIDI Inputs", please tick the check box to use your controller.
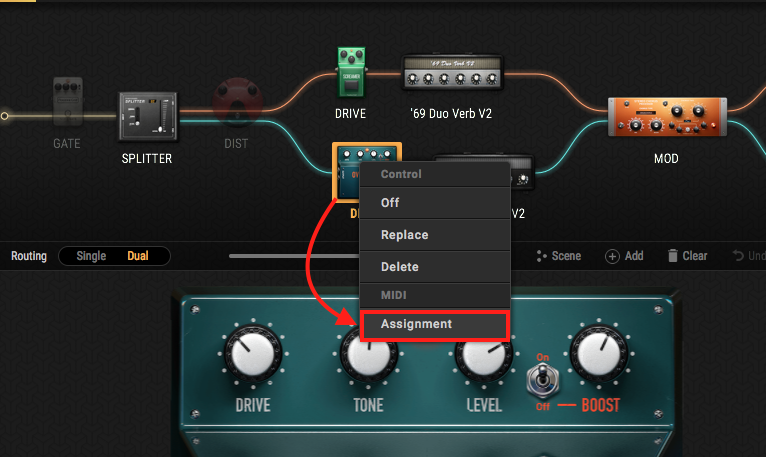
1. For Pedal Control, right click on the icon of the unit you would like to control. Then choose "MIDI/Assignment".
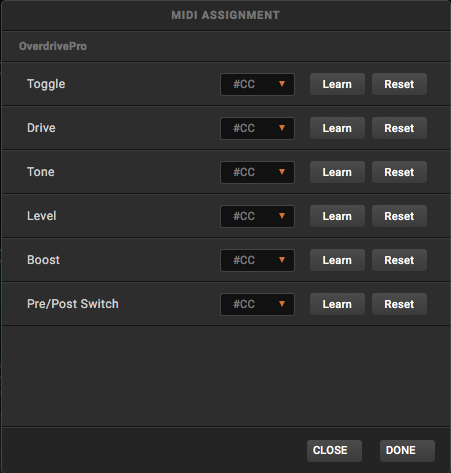
- You can set the CC numbers for the amp/effect selected here, or click on the "Learn" button, then move the knob/button of your MIDI controller to assign the message.
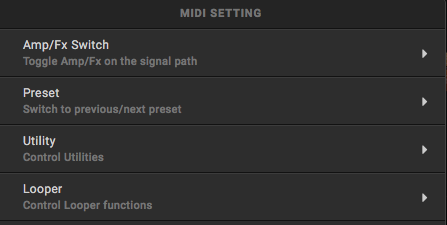
2. You can also assign more actions like toggling the Looper, Channels, and Tuner in Settings -> MIDI Settings -> MIDI Control Assignments.
Navigate to the settings menu by clicking the gear icon in the top right corner. ![]()


3. For Preset switching, we would recommend using the Program Change message. To set the Program Change message, please click on the Edit button of a specific preset to enter the Edit window.
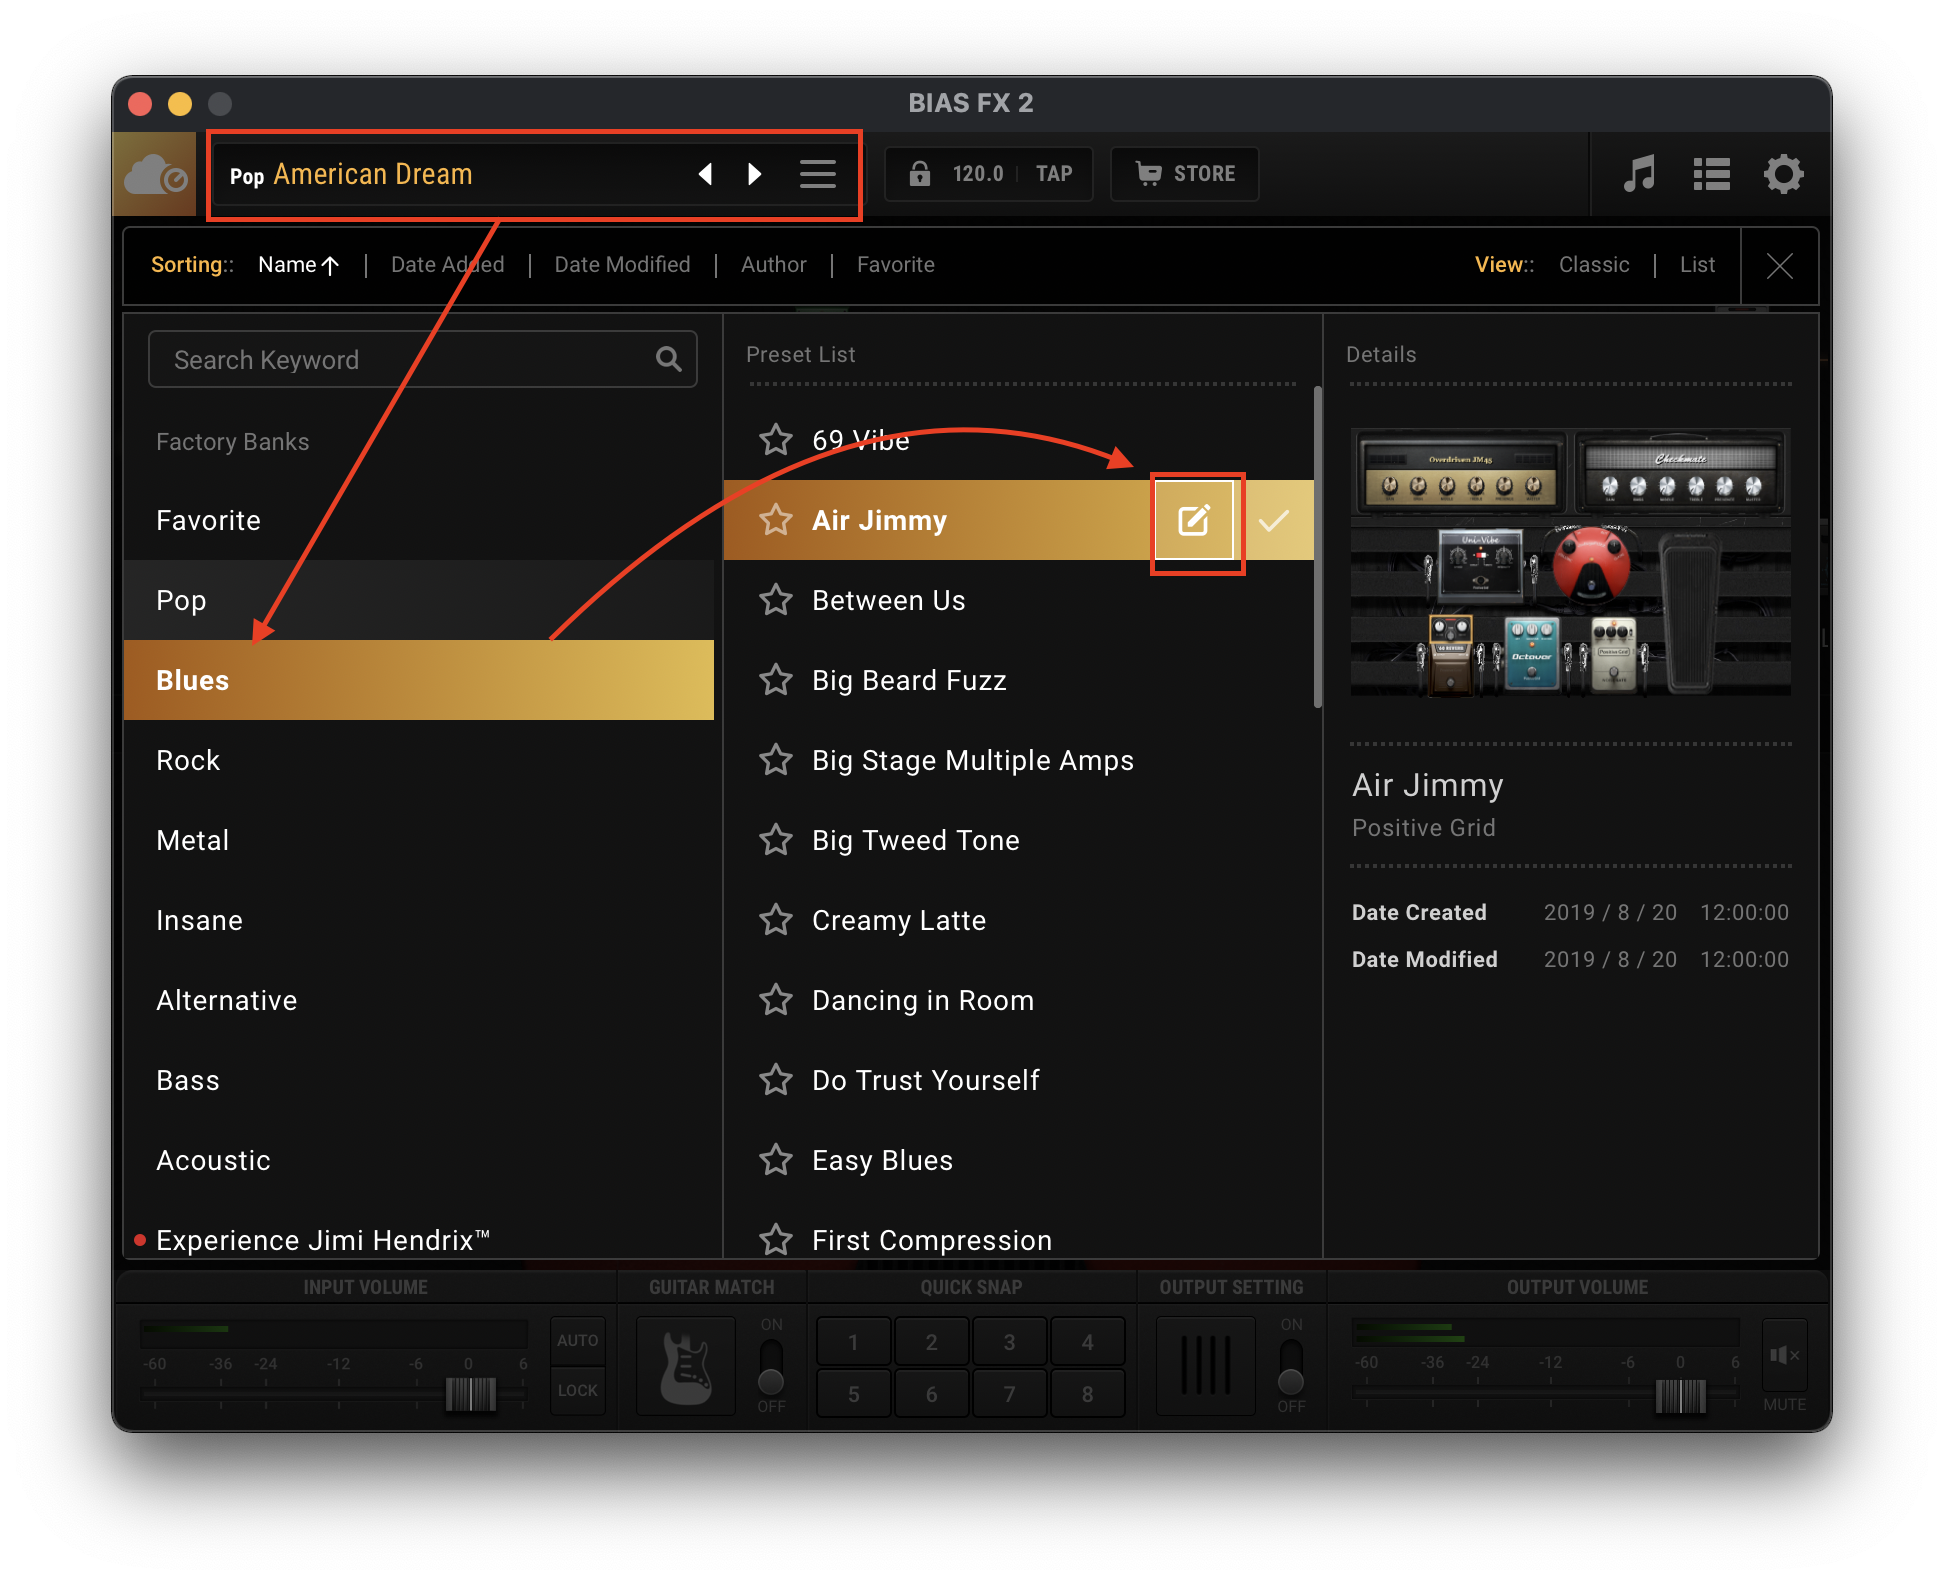
In the Edit window, you can set the Program Change number or change the preset name. Please note that a PC number can not be assigned to multiple presets.

Further reading:
MIDI Automation in BIAS FX 2 Plugin